Step-by-Step Guides to DIY Hairstyles
Creating beautiful hairstyles at home can be a fun and rewarding experience. Whether you’re preparing for a special occasion or just want to change up your everyday look, these step-by-step guides will help you achieve stunning results. From simple styles to more intricate designs, there’s a DIY hairstyle here for every skill level.
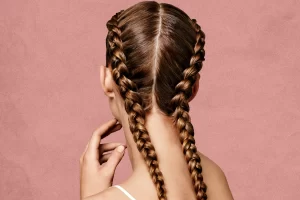
1. Classic French Braid
Step-by-Step Guide:
- Start by brushing your hair to remove any tangles.
- Take a section of hair from the crown of your head and divide it into three equal parts.
- Begin braiding by crossing the right section over the middle, then the left section over the middle.
- Add a small section of hair to the right and left strands before crossing them over the middle section.
- Continue this process, adding hair from the sides of your head as you braid downwards.
- Secure the braid with a hair tie once you reach the nape of your neck.
- For a more polished look, smooth down any flyaways with a bit of hairspray.
Styling Tips:
- For added volume, gently pull on the edges of the braid to loosen it slightly.
- Experiment with different braid sizes, from tight and sleek to loose and bohemian.
- Accessorize with decorative hairpins or ribbons for a personalized touch.
Why It’s Popular:
The classic French braid is a timeless hairstyle that works for any occasion. Its versatility and elegance make it a favorite for everything from casual outings to formal events.
2. Messy Bun
Step-by-Step Guide:
- Start by gathering your hair into a high ponytail and securing it with a hair tie.
- Twist the ponytail around itself to form a bun shape.
- Secure the bun with bobby pins, allowing a few strands to fall loose for a relaxed look.
- Gently tug on sections of the bun to create a messy, voluminous effect.
- Finish with a light mist of hairspray to hold the style in place.
Styling Tips:
- For a more textured look, tease the hair at the crown before forming the ponytail.
- Use a texturizing spray to add grip and volume to your hair.
- Accessorize with a headband or hair scarf for a chic, boho vibe.
Why It’s Popular:
The messy bun is the epitome of effortless style. It’s quick and easy to create, making it perfect for busy mornings or lazy days. Plus, it looks great on all hair types and lengths.
3. Sleek Low Ponytail
Step-by-Step Guide:
- Begin by straightening your hair using a flat iron for a sleek finish.
- Part your hair in the middle or to the side, depending on your preference.
- Gather your hair at the nape of your neck and secure it with a hair tie.
- Take a small section of hair from the ponytail and wrap it around the hair tie to conceal it. Secure the end with a bobby pin.
- Apply a shine serum to your ponytail for a glossy look.
- Finish with a spritz of hairspray to keep any flyaways in check.
Styling Tips:
- For extra smoothness, run a brush through your hair before securing the ponytail.
- Add a touch of hair gel to the roots for a sleek, polished finish.
- Accessorize with a statement hair clip or barrette for added elegance.
Why It’s Popular:
The sleek low ponytail is a classic and sophisticated hairstyle that works for both professional settings and formal events. Its simplicity and elegance make it a go-to choice for many.
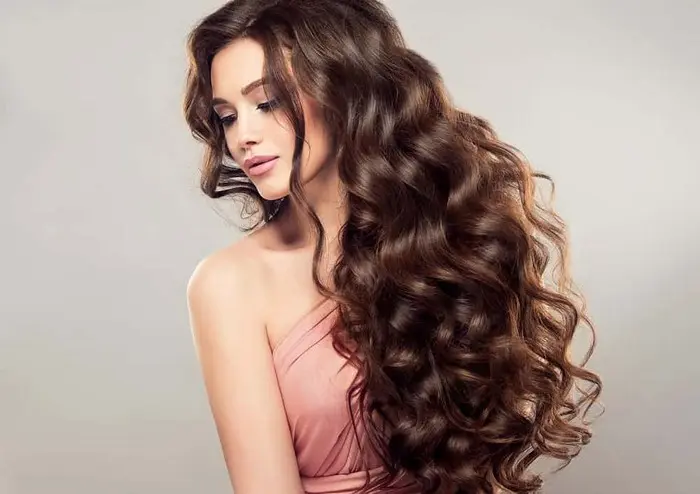
4. Beach Waves
Step-by-Step Guide:
- Start with dry, clean hair. Apply a heat protectant spray to shield your hair from heat damage.
- Using a curling iron or wand, take small sections of hair and wrap them around the barrel, holding for a few seconds before releasing.
- Alternate the direction of each curl for a more natural, tousled look.
- Once all sections are curled, gently run your fingers through your hair to break up the curls and create loose waves.
- Finish with a sea salt spray for added texture and hold.
Styling Tips:
- For longer-lasting waves, allow your curls to cool completely before touching them.
- Use a texturizing spray to add volume and definition to your waves.
- Consider adding a few highlights to mimic the natural sun-kissed look of beach waves.
Why It’s Popular:
Beach waves are the ultimate laid-back, yet chic hairstyle. They give off a relaxed, summery vibe and are perfect for any casual occasion. Plus, they’re relatively easy to create and maintain.
5. Half-Up, Half-Down
Step-by-Step Guide:
- Start by parting your hair horizontally from ear to ear.
- Gather the top section of your hair and secure it with a hair tie or clip.
- For added volume, tease the hair at the crown before securing it.
- Leave the bottom section of your hair loose and style as desired (straight, curled, or wavy).
- Optional: Take a small section of hair from the ponytail and wrap it around the hair tie for a polished look.
- Finish with a light hairspray to hold the style in place.
Styling Tips:
- Add a decorative hair clip or barrette to the top section for a touch of elegance.
- Use a curling iron to add waves or curls to the loose section for a more romantic look.
- Experiment with different braid styles for the top section, such as a fishtail braid or a Dutch braid.
Why It’s Popular:
The half-up, half-down hairstyle is versatile and works well for both casual and formal occasions. It combines the elegance of an updo with the ease of wearing your hair down, making it a popular choice for many.
6. Fishtail Braid
Step-by-Step Guide:
- Start by brushing your hair to remove any tangles.
- Gather your hair into a low ponytail and secure it with a hair tie.
- Divide the ponytail into two equal sections.
- Take a small piece of hair from the outside of the left section and cross it over to the right section.
- Repeat the process, taking a small piece of hair from the outside of the right section and crossing it over to the left section.
- Continue alternating sections until you reach the end of your hair, then secure with a hair tie.
- For a more relaxed look, gently pull on the braid to loosen it and add volume.
Styling Tips:
- For a bohemian touch, leave a few strands of hair loose around your face.
- Spritz with a light-hold hairspray to keep the braid in place without making it stiff.
- Try incorporating ribbons or small flowers into the braid for a whimsical look.
Why It’s Popular:
The fishtail braid is a unique and stylish alternative to the traditional braid. Its intricate appearance makes it a great choice for special occasions, yet it’s simple enough to create for everyday wear.
7. Twisted Crown Braid
Step-by-Step Guide:
- Start by parting your hair down the middle.
- Take a small section of hair from one side of your part and begin twisting it away from your face.
- Add more hair to the twist as you work your way around the back of your head.
- Continue twisting until you reach the nape of your neck, then secure with a bobby pin.
- Repeat the process on the other side, creating a symmetrical twist.
- Once both twists meet at the back, secure them together with bobby pins and hide the ends underneath the twists.
- Finish with a light mist of hairspray to hold the style in place.
Styling Tips:
- For a more voluminous look, gently pull on the twists to loosen them slightly.
- Add a floral crown or decorative pins for a festival-ready style.
- Use a curling iron to add loose waves to the rest of your hair for a romantic touch.
Why It’s Popular:
The twisted crown braid is a beautiful and elegant hairstyle that is perfect for weddings, festivals, or any special occasion. It gives the appearance of a halo braid but is easier to create, making it accessible for beginners.
8. Space Buns
Step-by-Step Guide:
- Start by parting your hair down the middle into two equal sections.
- Gather one section into a high ponytail and secure with a hair tie.
- Twist the ponytail around itself to form a bun and secure with bobby pins.
- Repeat the process on the other side.
- For a messier look, gently tug on the buns to loosen them and add volume.
- Finish with a light mist of hairspray to hold the style in place.
Styling Tips:
- Add glitter or colored hair spray for a fun, festival-ready look.
- Leave a few strands of hair loose around your face for a softer appearance.
- Accessorize with hair rings or clips to make the style stand out.
Why It’s Popular:
Space buns are a playful and trendy hairstyle that adds a touch of fun to any look. They’re perfect for festivals, concerts, or any event where you want to stand out and express your unique style.
9. Braided Headband
Step-by-Step Guide:
- Start by parting your hair down the middle.
- Take a small section of hair from one side of the part and begin braiding it towards the back of your head.
- Secure the end of the braid with a small hair tie.
- Repeat the process on the other side.
- Cross the braids over the top of your head to form a headband and secure with bobby pins.
- Hide the ends of the braids under your hair for a seamless look.
- Finish with a light mist of hairspray to hold the style in place.
Styling Tips:
- Add decorative hair pins or small flowers to the braids for a whimsical touch.
- For a fuller headband, pancake the braids by gently pulling them apart to add volume.
- Consider curling the rest of your hair for a romantic, boho look.
Why It’s Popular:
The braided headband is a beautiful and practical hairstyle that keeps your hair out of your face while adding a touch of elegance. It’s perfect for outdoor events, weddings, or any occasion where you want a polished look.
Conclusion
These step-by-step guides to DIY hairstyles offer a variety of looks that you can create at home, whether you’re preparing for a special occasion or just want to switch up your everyday style. With a little practice and the right tools, you can master these hairstyles and feel confident in your ability to create beautiful looks on your own.
Remember to have fun and experiment with different styles, accessories, and techniques to find what works best for you. The key to great hair is not just in the styling, but also in maintaining its health and vibrancy. So, take good care of your hair, and enjoy the process of discovering new and exciting hairstyles that make you feel your best.